Showing posts with label experimentation. Show all posts

Tuesday, 7 January 2014

My First Saikei

First, I should probably explain what a saikei is: begin the lesson!

A saikei is a miniature landscape in a tray, consisting of living plants, with rocks and sometimes water. Bonsai-like trees are incorporated in the display - though they are usually less mature than true bonsai - as well as ground cover and other types of plants.
Kawamoto Toshio, who invented the art form in the 1950s, set out various 'rules' that saikei should conform to, but being a new artform, they're not as rigid as with bonsai. Some designers contend that the landscapes should never include man-made elements such as human/animal figures, buildings, etc., but most of the photos I've seen include these.
Saikei is seen as a good introduction or 'easier' alternative to bonsai, as a pleasing display can be achieved almost immediately. As a more naturalistic effect is desired, the fine pruning and shaping required of bonsai isn't necessary. Saikei are also very versatile: as the plants grow, the display can be taken apart and re-designed. Potential bonsai can be grown in a saikei display until mature enough to be potted separately.
[For more information, see the Wikipedia.]

Now on to my first creation (and yet another photospammy post, I just can't seem to help myself lately) -

I had these three rocks that I'd found when we were inspecting my best friend's currently-being-built house a couple of months ago:


They're pretty cool. I'd been wanting to incorporate one of them into a saikei for a while. On New Year's Eve, I suddenly decided to do it! On the way back from picking up our party supplies, Husband and I decided to swing into Bunnings on impulse. I can get a bit giddy in these situations and sometimes don't make the best choices, but time will tell.

I didn't have time to do anything with my purchases on the day, what with preparing the party foods and all, so I left it til the next day. Can I just mention how it poured rain on New Year's Day here? It's meant to be the middle of summer, for pete's sake! I remember past New Year's Days when it's been so swelteringly hot we dared not leave the house! This summer has been so cool and wet so far, it's very unusual.
Anyway, back to the saikei. Here are the victims candidates:


Here we have a Buxus Microphylla 'Faulkner' (AKA Box, popular for hedges) and a Delosperma Echinatum 'Happy Days'. I didn't use the commonly-held principles when selecting the plants, like naturalism or similar hardiness, no, not me! I chose the Box because it had an interesting trunk which might make a good bonsai one day and it just seemed perkier than its fellows. I chose the Delosperma because it looked kinda cool and had a cute yellow flower on it.
Here's the pot:


I would have preferred a large, shallow tray, but the selection at Bunnings was limited. (The first time I visited, I was pleasantly surprised to find they had a bonsai section there at all.) I chose this as it was the flattest and widest they had, with the most unobtrusive coloured glaze.
One of the many fun parts is cutting the mesh to size and attaching it to the pot with wire loops:


The rock sat too low in the pot for my liking, so I used some smaller rocks that I'd found in the veggie patch to sit it on (don't worry, I washed them with disinfectant first). Yeah, for some reason the previous owners had at some point brought in a large amount of medium-sized gravel rocks and scattered them throughout the whole garden, even the veggie patch. It makes for interesting times! But at least the rocks are coming in handy. I put a couple of the more interesting ones aside in case I wanted to use them to decorate the finished saikei.


Now for some potting mix. I made sure to stuff plenty of it under the rock to stabilise it:


Then I pretty much just made it up as I went along. First, the Delosperma:


Apparently it's also known as the Pickle Plant. I like it. Now, the Buxus. Here's a close-up of the trunk showing the hopefully potentially interesting multiple trunks:


The poor thing had become a bit pot-bound during its time at Bunnings. It was a good job I rescued it!


There was no way it was going to fit into the saikei as is, so I cut about a third of the root ball off.
(The sky had become so dark now that the flash started going off!)


Roots tickled and arranged in the pot:


I tried to keep the weeds passenger plants intact to add a bit of interest and naturalism to the finished product. I had a bit of trouble making sure all of the roots were covered in potting mix, but I got there in the end. I created a nice little valley in between the plants.:


And yet it still seemed too sparse. It needed more! Many saikei I'd seen had moss as a ground cover, but even with the shocking weather here at the moment, moss in your average Australian garden in Summer is very difficult to come by. So I did what any half-crazy gardener would do - I went out into the rain and started digging around between the cracks in the concrete with an old bread knife!


This nice groundcover, well, I have no idea what it is, but it's going in!:

back view.

Later it occurred to me that, if it was growing on the shadiest side of the house under the eaves, then it might not like to live in the same pot as a sun-loving succulent and a piece of hedge, but I guess we'll see how it goes.


I added the two reserved small rocks, and some gravel to create the look of a dry riverbed. I put the white rock at the back to look like it was in the distance. The final touch was a panda figurine that my best friends gave me for Christmas. It stopped raining just as I finished it. I'm not joking.


I suppose it's hardly a naturalistic landscape, really. Why would a panda be doing the Happy Baby in a not-that-Chinese landscape under a monstrously large privet?? But it was fun to make, and fun to look at.

Oh yeah, I nearly forgot! Happy New Year!

Sunday, 29 August 2010

I finally finished my dice!

A few years ago I made a set of knitted fluffy dice. I posted them on Ravelry and I thought it was all done and dusted. Not so fast! It seems that, along with a few other projects that I made up myself, I accidentally posted them as a pattern, not a project. For a long time, I didn't realise that this would be an issue. Then in February of this year, I got a lovely and polite message from an admin asking when/if I was going to be posting my patterns to my pattern page. .... What the? ...

I was very surprised to find that, due to clicking the 'wrong' button 2 years ago, I have somehow become a knitwear designer. I was as shocked as you, my friends. There didn't seem to be any way to get out of it, so the only recourse was to finish the job off and actually write the patterns that were supposed to be on the website. I even chose a 'designer name' for myself. It was all very exciting and very scary. I had to make decisions like:
What should my designer name be? Do I need to add anything to my profile?
Is my blog what I want it to be, knowing that people will be linking to it from the Ravelry site?
Are the items I've already made up-to-scratch or should I make more professional examples?
Can I use the photos I already have or should I take new ones?
Should I put the patterns on my blog or should I make them into PDFs?
What's the best way to knit a cube?
How do I express that in the best way that others will understand?
And many more.

The worst part has been: the patterns are already listed on the site as patterns, even though they weren't actually there. People are able to search for them. They started asking me questions about them. I started feeling pressured and stressed. Like I had a deadline. I couldn't say what that was, but it was stressing me out. I had obligations all of a sudden. I had to make decisions that could be important in the future, and I had to make them quick! Anyone who knows me knows that I don't work very well under these conditions. Even just choosing a meal in a restaurant with the waiter there can make me freeze up.

In my own special, procrastinatey way though, I've been working diligently on the patterns. And I'm proud to announce that I finished the biggest one today! It involved knitting an example, and taking photos of it (Boy did that bit, he's a hero!), and re-configuring the dots and writing a pattern and drawing a colour chart and merging them into a PDF and figuring how to post it to Ravelry. And I did it!
Voila!


KNITTED FLUFFY DICE
The Pattern!

Even though the pattern is hosted on the Ravelry site, which requires an account to access, anyone can download the PDF from the above link.

*massively relieved*

Now I only have 2 more patterns to (re)write, and I will have paid my dues.
Then I can get started on some new ones. I'm actually quite liking this gig.
;)

Sunday, 20 June 2010

A Finished Page and More

I finished an art journal page in my main journal last week. It was one of the pages in my (seemingly perpetual) Unfinished pages post a few months ago. This is a refresher of what it looked like then:


This is the finished page:


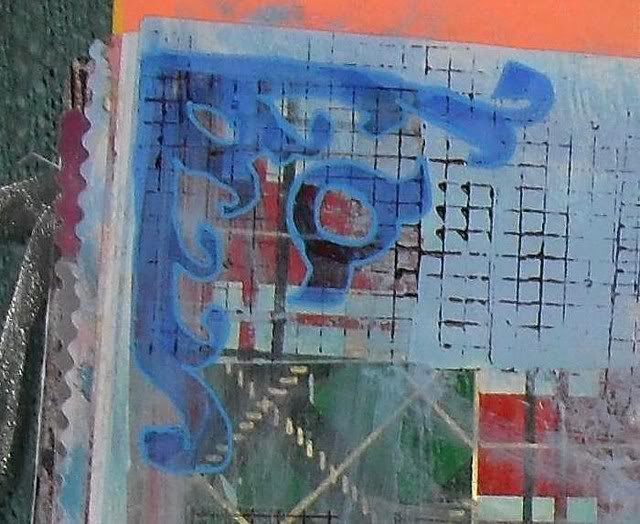
I'm calling it the Curlicue Page for obvious reasons. As I wrote previously, I hated the page at first. It grew on me though and now I quite like it, despite its flaws. Yeah, the composition is a bit wonky, but I like the collage elements and colours. I enjoyed drawing the swirlies with various pens so much that I couldn't help but love the page by the end of it! A few weeks later I 'finalised' it, 'branded' it if you will, by writing down a statement that had been swirling through my head for a few days previously. Then it was finished.

The materials I used were: gesso, acrylic paint, glaze medium, wrapping paper, magazine fragments, sugar packet, chopsticks packet, used & franked stamps, lolly wrapper, backing from a sanitary pad, rub-on, embroidery thread, deco tape, ShinHan Art Touch felt pen, Sharpie pen, Sakura gelly roll gel pen, pen & ink (Noodler's brand).

Here's a detail of the top left corner:


For good measure, here's a doodle / mandala thingie I drew last night while I was watching The Man with the Golden Gun. Apparently James Bond inspires. Originally I was going to colour it in with watercolours, but I like it better this way:


And a trip to the health food shop last weekend yielded this:


Sprouts! There are enough there to last Boy and I at least 2 weeks, if they don't go off by then. Perhaps we'll add less seeds next time.

Saturday, 22 May 2010

In The Kitchen: Muffin Tops!

Yes, muffin tops! But not that kind.
Boy came home from the supermarket earlier in the week with this:

Muffin top pan

Yes, indeed. It's the kind of kitsch kitchen gadget which makes you think to yourself, "why didn't I invent that when Seinfeld was still on, not ten years later?" Regrets aside, I used to be an avid muffin maker, so I dug out my old recipe and got going! I have a generic sweet and savoury muffin recipes that you can add any ingredients to and create different variations. Here is the sweet version:

3/4 c. self-raising flour
3/4 c. oat bran
1 tsp baking powder
1/4 c. brown sugar
OR equivalent of sugar substitute
pinch salt
1/2 c. plain yoghurt
1/4 c. milk
2 tbls butter, melted and cooled
1 large egg, beaten lightly

In a bowl stir together the flour, oat bran, sugar, baking powder, salt and any other dry ingredients.
In another bowl whisk together the yoghurt, milk, butter, egg and any other wet ingredients (including fruits).
Stir the yoghurt mixture into the flour mixture and stir the batter briefly until it is just combined.
Place the batter in a greased 6-cup muffin tin, dividing it evenly, and bake the muffins at 180oC for 25 minutes or until browned.


The mixture.

Today I added:

1 banana, mashed
1/2 tsp cinnamon
1/4 cup milk chocolate bits


(I also used 1 cup plain flour and 1/2 cup wholemeal flour as I didn't have any oat bran. You can really faff around a lot with this recipe - it's very forgiving.)

One large tablespoon of mixture in each 'top' seems to do the trick:

Raw mixture in the pan.

As they're half the size of traditional muffins, this recipe makes 2 batches, a total of 12. They don't need as long in the oven as traditional muffins, either. I baked them for 15 minutes. The tops were just browned and the choc bits gooey. Mmmmm!

Cooked muffin tops

I love Muffin Tops! There are almost infinite variations in flavour. (I made up about 12 different flavours in my old baking days.) I can wrap one up and slip it in my handbag without worrying that it's going to get crushed. They're a smaller snack for those who are health conscious. And you can easily turn one upside down and spread butter on it as if it were toast if you're not so health conscious.

I think we may be seeing more Muffin Tops at La Cucina de la Apartmentcat soon!

Sunday, 2 May 2010

Finished!!

Well, bless my sodden aunt! I've finished an art journal page!

I don't really want to make too much of a fanfare over it because, quite frankly, it's not really that good. But it's finished, and that's what's giving me the sense of achievement. It was one of the Perennially Unfinished pages I featured a few posts ago. (It's the fourth picture down, if you're clicking.)

Here it is in finished style:

The Drabble. Acrylic paints, felt tip pens, gel pen, chalk pen, deco tape, masking tape, scrap cardboard, lolly wrapper, words.

Since we last saw it, I painted some white and black egg shapes on it using the pre-cut holes in Easter egg packaging as a template (serendipity right there!). I took to it with some sandpaper to give it a more aged, grungy look. You can see that best right next to the spine on the left page. I stencilled on the word 'art' using a stencil I made from masking tape a la Karen Michel's book. Then I went at it with my beloved Sakura Gelly Roll pens, creating borders, filling in the eggs with doodles and and generally just having fun. I could have added more, but then I decided to stop and declare it finished.

To me this is a transitionary page. (Is that a word? Well, it is now!) I can see myself evolving in it. It wasn't planned, the composition is pretty wonky, the background colours are ones I wouldn't' normally use, the text I wrote myself and the stencil and doodle elements are new for me. I did some crazy stuff on it that I didn't think would work - but it's turned out quite well. I like it.

Friday, 19 March 2010

Manky, Skanky and Dangerous to Know

I've been struck down with an early-autumn flu and haven't felt like doing anything except lying weakly on the couch. For once I've been a sensible girl and taken all the medications that one's supposed to at time like these. It's been an interesting ride. I don't know what's in that stuff, but it's made me feel a bit giddy. I've been saying things like, "that department is a bloated cash cow, floating serenely through the sky sucking up money like the cream off the top of the taxpayer's crop". My workmates thought it was a little odd.
I've managed to make headway on my journal cover though. My first writing journal was a normal, ordinary, spiral-bound exercise book of the sort you get at bog-standard, boring office supply shops. Normal and boring! After months of scribbling away, it was still only half full. I was so sick of it. I need colour and variety! So recently I decided to rip out the rest of the pages and declare it full, even though that's cheating horribly. I decided to make a nice, crocheted cover for it though, to make it more appealing to flip through in future.

I was experimenting here: I put my finger over the flash
and then tweaked up the colour in Photo Studio.

It doesn't look like much now, but I'm imagining flowers and dangly things later on. Possibly.

The Wish Journal project is on hold right now, as I decided that I needed to order some pretty paper for the cover. And of course some other pretty papers as well from the same Etsy shop - it's better value if you buy more! Right? I hope they come soon!

P.S. I'm very excited because I've just become an official Textile Designer! According to Ravelry, anyway. You know how I have trouble reading knitting and crochet patterns so I tend to make up stuff myself? Well, apparently that's designing! The site admin asked me to create a profile and get things up to scratch so that people have access to my patterns. Erm, some of them aren't actually written yet. But I'll work hard to fix that up over the next couple of days. You have to have a Ravelry account to access my profile, but I'll post it here anyway.
Wow!

Friday, 6 November 2009

Two new techniques for the price of One!

Well, three new techniques when you think about it.

It's been all about my art journal the last couple of weeks. I've been getting all excited about it. Here's my latest page:

Wabisabi. Acrylic paint, gel medium, spreader medium, vellum, textas, ink pen.

I discovered Leslie Herger recently and her technique for backgrounds: Sharpie Ghosting. Basically you take advantage of the fact that alcohol-based inks will bleed through paint applied over the top to create ghostly-looking writing that can be used as a background. On the left-hand side, I used three different colours of Sharpie on top of each other, going in different directions, as in the tutorial. I copied down random phrases from a TV show I was watching at the time. On the right-hand side I already had a purple-coloured background, so I just laid down one layer of writing, using my pastel [brand]. On this side I copied a passage from a book on Zen Japanese Stone Gardens that I'm reading at the moment. I covered both sides with a layer of plain white gesso paint, and was amazed at how the coloured inks magically appeared as the paint was drying. (If this had happened accidentally, I imagine I would have been pretty pissed off, but as it was deliberate, I thought it looked cool.)

Having laid down this really cool background, I didn't want to cover it up with collage, and was hesitant to even do a drawing over it. So I thought I'd try a gel medium transfer. I'd heard about these ages ago, but was too scared to try them. Many of the instructions seemed to involve dunking your whole artwork in a vat of water, and there were horror stories about either the image or the base being totally ruined. But I was feeling brave! I found some good instructions by Paul Fujita here and a video here.

So - a gel medium transfer involves applying a gel medium to an image on a piece of paper, gluing it to your artwork and removing the backing paper, therefore transferring the image to your artwork. As the name implies! The image can be a photocopy, a printout from an ink jet printer, or a page from a magazine. The thing about transfers is that you don't have the hard edges that you get from a collage, and the background shows through any light areas. Making them unbelievably cool!

Wabisabi. Transfer on left page.

I did the one on the left first. It's sourced from a book I'd photocopied a few years ago when I was collecting pictures for a zine I was writing. I kept the spares just in case. Supposedly fresh photocopies work best, but I had no issues with this at all. Once the backing paper was all stuck down and completely dry, I then had to wet my finger slightly and rub at the paper until it came off in little pills. I had to rub and rub and rub! I tried using different tools - an eraser, scrunched up paper towel, a sponge - but they all took off sections of the gel medium (hence the big hole in the middle). So I went back to using my finger. I'm telling you, by the end of it, my fingertip was all red and sore! But I was so excited, I just kept going and going. My finger still hurts, but I regret nothing.

Once the transfer was done, I sanded it slightly as it felt very rough. Then I sponged a light layer of orangish-yellowish acrylic mixed with glaze medium over the whole double page, to unite both halves. The glaze brought out the ridges and brushmarks in the layer of paint below. I love this! In trying to decide what to do with the other half, I thought, screw it! I'll just put in another transfer! (By this time it was a few days later and my finger had had a little time to recover.) I chose an image from the same book I'm reading on Zen Japanese Stone Gardens. Wanting a subtle effect, I chose an image with a yellow background to match my background rather than a photo of greenery (it's a page from an Edo Period gardening manual); I scanned it and printed it. Then I glued it on down and went to work!


As I was working on this section, the concept of wabi-sabi kept coming to mind. There was a definition in the book, so once the transfer was finished, I wrote it in next to the transfer. I used rubber stamps to stamp the word across the top in a subtle lavender colour that echoes the purple background which peeks through at the edges on the right-hand side. (Which I'd first laid down a long time ago, before any of this was even thought of. Concepts of impermanence, change and time passing are starting to weave into this page, too. One thing I love about art journalling is that when I lay down the first background of a page, I'll usually have no idea what it will end up as, or even how long it will be before I go back and work on it again.)


The final touch (and the third technique) is a tiny envelope made of blue vellum with a little note inside. I bought some packets of different coloured vellum from ebay last week. I didn't realise it would be so stiff and thought it would be more transparent, like the envelopes that postage stamps are kept in. Oh well, I thought I'd use it anyway. I made the envelope from a template I found online and printed it out way too small. But I kind of like it that way. The note just records that the image is a painting is by Vincent van Gogh and the date; I couldn't really think of anything interesting to write. In the future though, I'd like to use envelopes to hold pieces of ephemera and 'secret' notes to make my journal more interesting to flip through once it's finished.

I'm glad I finished the page on Saturday, because the last few days have been so hot that I haven't felt like doing anything. Normally I try to be philosophical about the heat, but I've had bad hayfever too, and that's a recipe that just adds up to grumpiness! Last night I started doing an easy doodle to keep my mind off how I'm feeling. I'll show you that once it's finished.

Keep cool, everybody!


P.S. Thanks for bearing with me, with these long, detailed and probably very boring descriptions of my art journalling. I'm mainly using them as a record for myself of what I've done, as well as a writing exercise to keep my brain busy.

Sunday, 1 November 2009

Recent Art Journal Pages

I started this page ages ago by impulsively scribbling down the Shakespeare quote. A long time later, I used gel medium to glue down torn strips of a photocopied page of a story I'd written. I still had no idea what to do with it. Much later again, I decided to try out my new acrylic spreader medium on it. When mixed with acrylic paints, it turns the medium into a transparent glaze. I used it with navy blue and a little silver, and sponged it liberally all over. Then I went over the quote a few more times with greylead and purple pencil to make it stand out a little more (but not too much - I wanted it to have a shabby, mundane look). I was tempted to add more elements, but I decided to leave it there, with a slightly minimalist (for me) look. The gel medium I'd added previously and slopped about without really thinking about it created an unexpected batik effect when I added the thinned navy paint over the top.
The page went from one I felt very ambivalent about to one that I really quite like.

What A Piece of Work. Photocopied text collage, gel medium, pencil, acrylic paint in spreader medium.

This page really has two different topics, but I bound them together visually using my new aqua blue acrylic paint. I don't really like the composition of the collage - that's something I feel I need to work on. I do like the drawing and juxtaposition of the heart element with the writing. This is when I started to realise that it would be fun to collect receipts and other scraps that I would otherwise have thrown away, and use them as mementos of a particular occasion.

I Want A Holiday / Visit from Mum. Magazine image, wrapping paper and ephemera collage, acrylic paint, metallic rub, pen.

As you can see, I'd been using this page to practice calligraphy. I didn't want to waste the rest of the page though, so I used the striped paper scrap to separate it from the rest of the page. I'd started out laying down light blue paint vertically; I added the dark blue oil pastel horizontally to suggest the ocean. The sails are a nod to the Sydney bay paintings of Brett Whiteley - I wanted to convey a sense of space, sunlight and heat. (I've obviously been yearning for the Spring that the local weather hasn't yet been providing this year.) I added green glitter glue to suggest the ocean swells sparkling in the sunlight.
I don't normally use quotes in my journal, but I added a few lines from a song that's been stuck in my head a lot lately.

Into The Blue Sea. Paper and ephemera collage, acrylic paint, oil pastel, felt-tip pen, glitter glue.

Here is a shot of the outside of my journal. I've only used about 10 pages, but it's starting to look obese already. That's inevitable when you're adding thick paint and glued-in papers to nearly every page. I've starting thinking about cutting out some of the central pages to even it out a bit.

On The Edge.

I did this page earlier today. It's in a new journal that I've started which is for when I want to concentrate on practising drawing with little to no paint, or I want to document something in my life, like the meal that I cooked on Thursday night:

Dirty Rice. Pen, watercolour.

Tuesday, 16 December 2008

Flurries of activity

Mini monster is finished!

Perhaps one of my New Years' Resolutions should be to take better photos!

He's a few days late, oops. I'm terrible with deadlines. I love to do things for people and send them things, but I'm no good at actually organising it to be done. I have an excuse this time, though. You see, Boy downloaded Sim City 3000 for me. I'd mentioned to him that I was a bit nostalgic for it. I'd been completely obsessed with it about 6 years ago. Then my computer died and I lost all my cities, as well as my not-quite-legal copy of the game. I grieved, and I moved on. Other computer games filled in the gap. None of them had quite the same charm, though. Now it's back in my life - and it's back with a vengeance! My first city is named Lennyville (after my laptop). I may never craft again. (Just kidding.) Actually, SimCity is quite a good game for the crafter, as you can leave it running on the slowest setting and do some craft while you decide what to build next. As long as I keep one eye on the info bar where any problems or complaints come up, I'm easy!

Anyway, monsty is finally done. I thought ahead a little bit and made all of his arms and legs first before I started on the body. That way I got the fiddly bit over and done with, and I didn't have to worry so much about running out of yarn and/or not being able to re-create what I had done before. I think I will do it that way from now on. I had some trouble with his hair. First I tried embroidering it with eyelash yarn for a fuzzy look. I failed completely. No, it wasn't me, it was the yarn. Grr! I DON'T recommend doing this. The fuzzies on it make it impossible to pull through the hole, and the yarn is very weak so it snaps when you try to pull it hard. Resulting in much aggravation. When I switched to plain black acrylic I had much more luck. It took quite a while to cover his whole head though, and I'm not all that happy with the result. To me he looks like an army recruit! The monsters definitely need hair, though. They just look naked without it. The three methods I've tried are:
1. needle felting (Monstrous Muriel);
2. embroidery (mini-monster);
3. holding eyelash yarn together with the yarn used for the body (Scary Selby)
(I know I've only shown 2 of those up til now, sorry!)
Needle felting is the most aesthetically pleasing to me and the least pain in the butt to accomplish. With this particular monster, I decided to use black buttons for the eyes, but I immediately regretted it. That indefinable aspect that gives the face personality was missing. I made a last minute decision to embroider on some eyebrows, and that helped a lot. It still takes time for me until the bits of haberdashery I've attached seem to meld together into a face and they 'come alive'. I don't really have time for mini-me to sit there and develop a personality - I have to send him off straight away and just hope the recipient can see something in him. I also sent my swap partner the green and purple Japanese braid that I showed you in progress in the last post. I couldn't think of anything to do with it straight away, so I neatened up the ends into tassels and put it in with the package. I figure the green is quite festive!

I got so excited about working on monsters that I even got out the long-neglected Scary Selby and finished off his head as well. I've only got his arms to go now! Selby has the most adorable face; I can't wait to show him off to the public.

Last Thursday I also went to the Kris Kringle Night Market at Northcote Town Hall. I'm so glad that some of my friends could come along as well and support the handiness. I picked up some neat stuff:


There's an elfy Christmas decoration from jellibat, a little pouch to keep my USB stick in so it doesn't get lost in my bag, and a giant pincushion from the MS Society stall. I did get a couple of other things, but I can't show them to you because they're gifts. Even though I spent a little more than I would normally on these items, I loved doing it because I know they're made by someone from start to finish, not just churned out of a pollution-belching factory somewhere.

My copy of Japanese Braiding for Beginners arrived on Friday as well. I'll talk more about that next time. That one was a reward to myself for achieving my first weight loss goal. I've been buying way too many presents for myself lately, though! I promise I will save up more money next month for travelling!

Work has been very very busy, and it's been annoying that I've had to spend my spare time organising things. Now that I've finally finished something though, I just have to decide whether to finish my current braid next, start a new mini-monster, or do the sausage dog with antlers embroidery I found on a blog the other day. Decisions!

Friday, 3 October 2008

End of September Wrap-Up

Boring for you, but instructional for me.
My goals for September and results:

1. Increase items in shop to 38.
The number actually went down this month! I let some expired items stay expired because I didn't like the way I'd photographed them. But with Boy's new camera, we can fix that!

2. Work 2 hours on Long Term projects.
I did this and then some! I'm really enjoying knitting or crocheting while I listen to the audiobooks I downloaded from The Classic Tales Podcast and I was itching to do a lot more! But I held back because I knew I had so much else to do! I worked on Branwell the Brachiosaurus while I finished The Hound of the Baskervilles. I had never read any Sherlock Holmes mysteries before and I have to admit I had a pre-conceived notion of what it would be like. I was all ready to be hatin' on Holmes when he swept in at the end and solved the case after Watson had done all the work. I was really angry at how Holmes treated Watson. What is their relationship, anyway? Friends? Master and servant? Whatever it is, Holmes has him wrapped around his little finger. Poor Watson has no confidence in himself and is petrified of putting a step wrong. But even I had to be impressed by the lengths Holmes eventually went to to solve the case and the intelligent twists and intriguing clues. In spite of myself, I enjoyed it. Anyway, this wasn't supposed to become a book review!

3. Do 2 pages in Art Journal.
I did one and have finished the other today. I also started two others which I should hopefully finish next month. I've been experimenting more with layering paint and collage elements. I also want to try some more new techniques, so I will continue this one.

4. Utilise drawing board.
I stuck a few postcards to it with blutac, does that count? At the moment it's broken and in the way, but Boy and I made a plan which hopefully we'll carry out this weekend. It's past the deadline, but it'll still happen.

5. Look through old paintings and list one in shop.
I never got around to this. I was too busy playing computer game.

6. Reduce number of projects by 2.
I reduced them by one. I did start 2 projects and then finish them this month, but I don't think that counts!

This is one of the projects I finished:


It's the headband that I crocheted. I'm very happy with how it turned out - only it's a bit too small! I'll have to add maybe 5 stitches when I make the next one. But I can't remember if I did 70 or 75 last time. Am I feelin' lucky, punk?

Here is the other one:


It's a laptop sleeve for my laptop, Lenny. It's just a very simple cover that will protect him from scratches, etc. (Soryr that the photo is so small and fuzzy.) I can feel this is only the beginning of the great pouch frenzy. Soon, all of my belongings will be in pouches! Even Boy! hehehehe

Here's my latest art journal entry. The theme is Spring. And mucking around with paints and collage. I like sticking stuff. It's calming. I really want to start another altered book but a) I already have one on the make; and b) shnyeh, who has time?


Some time ago I also blocked my skinny scarves. I think I've mentioned before that I was happy with them except for the fact that the ends twisted into ringlet curls that would look great on a 5-year-old girl, but not on my scarves! So I blocked them:


They turned out all right - the photos of them didn't! Boy, help!

OCTOBER GOALS:
1. Work 3 hours on Long Term projects.
2. Reduce number of projects by 2.
3. Finish 2 pages of altered book.
4. Re-arrange hobby room: drawing board area.
5. Start new zine. (I signed up for another zine swap. Oops!)


P.S.
Confused by the Sub-Prime Mortgage Crisis? Read this simple yet biting comic.

Monday, 22 September 2008

Spring Cleaning

Hi!

During last week, I mostly worked on my Art Journal and laying down a base for painting on my art book. I used this journal entry to let out the stress and frustrations of the week, and it's pretty moribund. I did most of it while I was either drunk or hungover. So I'll just show you a detail:


This corner shows how I've taught myself to always find something positive in the bad and try to draw it out.

Materials include: acrylic paint, scrap fabric, scrap clear plastic, sticker offcuts from Kinder Surprises, scrunched up tissue, wine (applied with fingers), glitter glue.

My next entry will be all about Spring! If only the weather would co-operate....

Then on Saturday I made a display board showing all my projects with a bar showing how far off they are from being completed. Basically it has the same info as the sidebar of my blog, except it has the handy bonus that I don't have to log on to look at it! Now when I can't decide which project to work on, I have it all there to help me decide. I laminated the backing sheets and the project cards so they can be written on with whiteboard markers and erased. (The marker I stole obtained from work says erasable on it but geez, it takes a lot of rubbing and spitting to get it off! I wonder if it might have something to do with the laminated surface. Or possibly karma. The concept is solid anyway, even if the details are a bit wonky, I think). I'm finding it handy already.

It helped me decide to rip this:


Yup, it's all gone! Sparky's lovely dress that was reduced to a tunic (due to a shortage of yarn) that was reduced to a funny-lookin, half-finished, shoved-in-the-back-of-the-cupboard bit of a woolly mess. I loved the feel of the yarn, the colour, the lace pattern that alternated with columns of reverse stocking-stitch. It was the human element I didn't like - the wavy hem, the crooked column edges, the wonky stitches around the lace, the atrocious-looking join between the body and the yoke. So in the spirit of spring cleaning, out it went! Sorry Sparky, I'll make you something smaller but much nicer for your birthday this year.

I'm already utilising my rescued yarn to make this crocheted headband. I'm experimenting with a design that pushes the top of the crocheted stitch outwards and turns it into a design feature. (Sorry, no pictures, I can't be bothered. Next time, I promise!) I really like how it's turning out, and I might make a few in different colours. I might actually mean it this time, too!

Meanwhile, I was having a really serious think about this knitted sleeveless top (I believe they're called a shell in the U.S.) that I started about 2 years ago. I'm about 1/4 of the way into it:

[This picture was taken a while back. It's about twice as long now.]

At first I thought, "are you serious, girl? What were you thinking? You're gonna look like you're wearing a Muppet-fur vest!" Then I thought some more and I think it wouldn't be so bad as a cardigan. This piece could be the back; there's still plenty of leeway to make two fronts, a collar and some cute cap sleeves and have plenty of wool left over for making matching accessories. Rockin!

I also completely cleared off the table in the lounge and made it into a painting/drawing station, leaving plenty of room in the hobby room for a sewing station on the big desk. I don't have a picture of this cos - well, how boring would that be?
My only concern is that the light isn't as good in the lounge. You see, the slat blinds are broken in both rooms (long term issues with the landlord, grrr!). They won't go up and down, but I can adjust the angle to let some light in. I keep the one in the lounge permanently down so that when Boy and I are out, rudey people can't peek in at our stuff. The one in the hobby room is permanently open because there's nothing for said people to look at; it's tied open with an ingenious system of cords and old lanyards. I have a small lamp on the painting table in the lounge, but it doesn't help much. I'm thinking of getting a natural light lamp because - well, how cool would that be?

Anyway, bye!

P.S. Monstrous Muriel is in the shop!

Saturday, 23 August 2008

My week

I saved up everything until today, basically. I had a pretty stressful week at work and I just came home and crashed out in front of the Olympics every night. Today though, I unpacked my goodies from my trip to Daylesford last weekend. I went on a disgustingly decadent shopping spree amongst all the op shops, antique shops and bookshops I could possibly find. There was yarn, there was fabric, there were dress patterns, there were books and even vintage embroidery transfers that I got in a grab bag. There was so much that I couldn't possibly take photos of it all, so here's a limited selection:

A hand-carved Indian fabric stamp with wool and braid

Yarn, Japanese fabric, dish and odd pencil-holder thingy

These photos were taken by Boy with his whizzy new amazing camera. I think he had fun. He also took lots of photos for me today of my knitted and crocheted accessories I already had on Etsy. I had taken photos of them with my much beloved but frankly fairly old and clunky camera when I first listed them, but I never liked the photos and thought they were preventing me from getting more sales. I gave some of them interesting effects in Piknik as well. Here is one:

Finally, I am introducing my head model, Hedda to my shop. I got her about 2 months ago and I only just got around to using her for anything! Actually, I've been displaying an almost finished scarf around her neck for a while, so she doesn't feel too useless.

I spent a lot of time today tidying the hobby room and putting away all of the stuff I bought on my trip, and also at Lincraft the week before. I wouldn't say I'm back to square one, but things are looking a bit more tidy.

During the week, I did manage to design faces for Monstrous Muriel (final title) and Scary Selby. I stuck them into my art journal, cause I haven't really been using it for anything else, and it's for journalling as well as art, right? So even if it seems too scary to put art in it, I can put journally stuff in it without fear!
Anyway, here is a pic of the pages and the current progess of my scary pair:

Left: Monstrous Muriel; right: Scary Selby.

The legs and body were made in one piece with both toys. With Scary Selby however, I experimented with making a gusset between the legs so I could place them some distance apart. I'm very happy with how it looks. I'm a bit concerned about their heads though. The closing-up part of crochet always looks really hinky, well for me, anyway. I don't know if I should put some hair on them to disguise this, or find some other solution.

I've had 1 1/2 glasses of champagne so far, so I don't really care right now!