
It's been all about my art journal the last couple of weeks. I've been getting all excited about it. Here's my latest page:

I discovered Leslie Herger recently and her technique for backgrounds: Sharpie Ghosting. Basically you take advantage of the fact that alcohol-based inks will bleed through paint applied over the top to create ghostly-looking writing that can be used as a background. On the left-hand side, I used three different colours of Sharpie on top of each other, going in different directions, as in the tutorial. I copied down random phrases from a TV show I was watching at the time. On the right-hand side I already had a purple-coloured background, so I just laid down one layer of writing, using my pastel [brand]. On this side I copied a passage from a book on Zen Japanese Stone Gardens that I'm reading at the moment. I covered both sides with a layer of plain white gesso paint, and was amazed at how the coloured inks magically appeared as the paint was drying. (If this had happened accidentally, I imagine I would have been pretty pissed off, but as it was deliberate, I thought it looked cool.)
Having laid down this really cool background, I didn't want to cover it up with collage, and was hesitant to even do a drawing over it. So I thought I'd try a gel medium transfer. I'd heard about these ages ago, but was too scared to try them. Many of the instructions seemed to involve dunking your whole artwork in a vat of water, and there were horror stories about either the image or the base being totally ruined. But I was feeling brave! I found some good instructions by Paul Fujita here and a video here.
So - a gel medium transfer involves applying a gel medium to an image on a piece of paper, gluing it to your artwork and removing the backing paper, therefore transferring the image to your artwork. As the name implies! The image can be a photocopy, a printout from an ink jet printer, or a page from a magazine. The thing about transfers is that you don't have the hard edges that you get from a collage, and the background shows through any light areas. Making them unbelievably cool!

I did the one on the left first. It's sourced from a book I'd photocopied a few years ago when I was collecting pictures for a zine I was writing. I kept the spares just in case. Supposedly fresh photocopies work best, but I had no issues with this at all. Once the backing paper was all stuck down and completely dry, I then had to wet my finger slightly and rub at the paper until it came off in little pills. I had to rub and rub and rub! I tried using different tools - an eraser, scrunched up paper towel, a sponge - but they all took off sections of the gel medium (hence the big hole in the middle). So I went back to using my finger. I'm telling you, by the end of it, my fingertip was all red and sore! But I was so excited, I just kept going and going. My finger still hurts, but I regret nothing.
Once the transfer was done, I sanded it slightly as it felt very rough. Then I sponged a light layer of orangish-yellowish acrylic mixed with glaze medium over the whole double page, to unite both halves. The glaze brought out the ridges and brushmarks in the layer of paint below. I love this! In trying to decide what to do with the other half, I thought, screw it! I'll just put in another transfer! (By this time it was a few days later and my finger had had a little time to recover.) I chose an image from the same book I'm reading on Zen Japanese Stone Gardens. Wanting a subtle effect, I chose an image with a yellow background to match my background rather than a photo of greenery (it's a page from an Edo Period gardening manual); I scanned it and printed it. Then I glued it on down and went to work!

As I was working on this section, the concept of wabi-sabi kept coming to mind. There was a definition in the book, so once the transfer was finished, I wrote it in next to the transfer. I used rubber stamps to stamp the word across the top in a subtle lavender colour that echoes the purple background which peeks through at the edges on the right-hand side. (Which I'd first laid down a long time ago, before any of this was even thought of. Concepts of impermanence, change and time passing are starting to weave into this page, too. One thing I love about art journalling is that when I lay down the first background of a page, I'll usually have no idea what it will end up as, or even how long it will be before I go back and work on it again.)
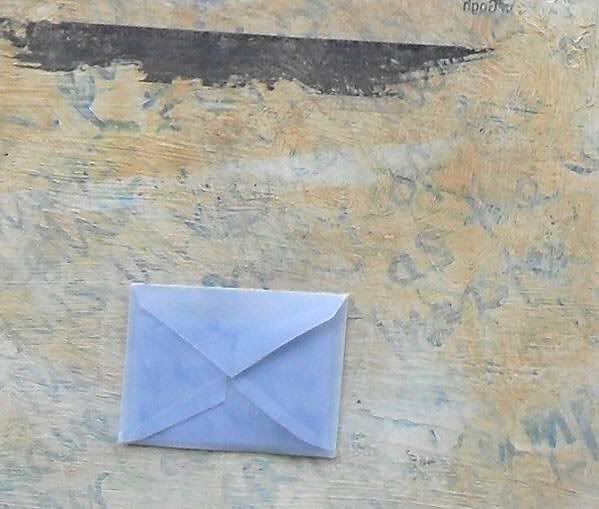

The final touch (and the third technique) is a tiny envelope made of blue vellum with a little note inside. I bought some packets of different coloured vellum from ebay last week. I didn't realise it would be so stiff and thought it would be more transparent, like the envelopes that postage stamps are kept in. Oh well, I thought I'd use it anyway. I made the envelope from a template I found online and printed it out way too small. But I kind of like it that way. The note just records that the image is a painting is by Vincent van Gogh and the date; I couldn't really think of anything interesting to write. In the future though, I'd like to use envelopes to hold pieces of ephemera and 'secret' notes to make my journal more interesting to flip through once it's finished.
I'm glad I finished the page on Saturday, because the last few days have been so hot that I haven't felt like doing anything. Normally I try to be philosophical about the heat, but I've had bad hayfever too, and that's a recipe that just adds up to grumpiness! Last night I started doing an easy doodle to keep my mind off how I'm feeling. I'll show you that once it's finished.
Keep cool, everybody!
P.S. Thanks for bearing with me, with these long, detailed and probably very boring descriptions of my art journalling. I'm mainly using them as a record for myself of what I've done, as well as a writing exercise to keep my brain busy.
No comments:
Post a Comment