
The workshop was held at NOIR Darkroom, a new space dedicated to analogue photography and all arts with an emphasis on community participation. Husband and I were the only participants as the other person was unable to attend, so we had the full attention of our host Jess.
Cyanotype is a very early form of photography invented in the 1840s. It uses a combination of two chemicals: potassium ferricyanide and ferric ammonium citrate. When mixed, these create a light-sensitive solution. Despite their scary-sounding names, the chemicals involved are relatively safe, and that makes the process suitable for children as well as adults. We mixed our chemicals together, after first preparing our paper. We were given several types of watercolour paper with different textures and shades, so we could see the results from each. Preparing the paper just involved tearing it into any sizes and shapes we liked.

Next, we painted the solution onto the paper. At this stage it was a light greenish-yellow colour. This should be done in a fairly low-light environment and the paper turned upside down straight away, to protect it from being exposed to sunlight too soon.

While we waited for our paper to dry, we played with some sheets that Jess had prepared earlier. There was a table of items of different shapes and textures to choose from, both natural and man-made. We arranged items onto clear acetate and laid the paper down on top, then a layer of thick cardboard. It's important for a clear image for the items to be touching the paper, so we used bulldog clips to keep everything as flat as possible.

We laid out our creations outside in the alleyway behind the building. Unfortunately it was a cloudy day, and the photograms took much longer to develop than they would if it was a sunny day. Images are also clearer and more detailed on sunny days as the shadows are sharper. Here you can see prints in different stages of development. The solution turns from a light yellow to dark greenish blue quite quickly. In some there were shades of grey or red as well.

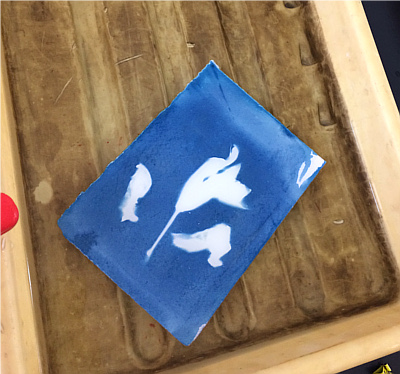
To develop the prints, we washed them in a tray of ordinary water. During the washing, the prints magically turned from greenish-grey to a spectacular blue within about one minute. The shapes often looked quite different after washing, too, so we never knew what we were going to get until the end.


After trying out several of the items from the table, we went for an art walk to find things in the neighbourhood to work with. We took a few sheets with us in envelopes made of black paper, and a couple of sheets of acetate and cardboard backers. Cyanotype is a very portable medium!
We used found items to make more prints, and Jess showed us how to attach sheets to things like a chain-link fence to take imprints of them. It was a lot of fun searching and looking at our environment in a new way. When we returned to the workshop space, we developed them in water and laid them out to dry.


At this point the prints are fixed and no more treatment is needed. Cyanotype is a very stable medium: many prints from over 150 years ago still exist. It can be done on almost any porous surface: fabric, yarn, dried leaves, walls. The possibilities are very exciting. I want to find ways to combine art and craft, so I'd love to try printing on something like a knitted or crocheted surface.
The workshop was a lot of fun as well as informative, and I would definitely return for more. Incidentally, NOIR Darkroom is also where the exhibition I'm involved in opens later this week, so you'll be seeing more of this venue in future posts.
No comments:
Post a Comment