Wednesday, 28 April 2010

Changes

A few factors have come together recently to make me think about how I do things.

Why do I go into a flap every time I sell something on my Etsy [shop closed] and then procrastinate like crazy until the Guilt Monster swallows me up and I fail my ridiculously high standards and the parcel doesn't get sent for *GASP* 4 whole days!! Why do I find that unacceptable?
Why did it take me nearly a year to get up the guts to ask for leave at work? Why do I have such trouble asking for what I want?
Why do I keep clinging on to things I don't really need or want anymore? Like the two cupboards-full of yarn that I know deep down inside that I'll never use up? They're clogging up space so much in our hobby room that I don't have room to do things I really want to do.
Why do I write notes when I send my orders saying, "I hope you like it"? They bought it for a reason, didn't they? I should be writing, "you're probably gonna like it because I think it's great!" I appreciate all those wonderful shoppers so much - thank you! I should appreciate myself a bit more, though.
Why do I use the word "should" so much?
Why do I spend so much time on the computer looking at other people's creativity and so little exploring my own? And why does the Guilt Monster yell at me about that, too?
Why do I spend so much time curled up into a big, tight Stress Ball when I'm pretty sure I know enough about myself to know how to uncurl from it?
Why do I act more like my real self at work than I do with my friends? Am I the only person in the world to be in this situation or what?
Why don't I seem to manage to drink 2 litres of water every day?
Why aren't I Naturally Slender yet??
Why does it even matter?
Why have I had Bad Romance by Lady GaGa, but sung in the voice of Olive Oyl, stuck in my head for the last week? Does my brain hate me??

What's prompted all this self-reflection and scary over-sharing? Blogs!
* A while back, I subscribed to Four Rooms blog [now closed]. The writer has made it her mission to live by the old Native American concept of Four Rooms. Our lives consist of the Physical, Mental, Emotional and Spiritual, and we should endeavour to spend some time in each of these 'rooms' each day to lead a balanced life. I realised that I've been trying to do this for some time by making sure I do some exercise every day, as well as having some quiet time and some creative time. Most days I don't quite get there! But on the days that I do, I feel much better. It's helpful to me to have concrete concepts and imagery to concentrate on, so I want to adopt the Four Rooms idea to make my life more balanced.

* I found Havi at Fluent Self recently. She's all about improving herself, overcoming fears and coaching others to do the same. I love her lighthearted style and use of silly words to make the process more fun and interesting. I could probably do with some more Iguanability (accountability) and regular Chickens (check-ins) myself!

* I also like to read Hyperbole and a Half, because Allie reminds me that you can be individualist and nonsensical and a little bit crazy and you can talk about your experiences and fears and people will still love you and it's not that scary after all.

I've made a decision. I'll tell you about it in a couple of days, when I have the details sorted out.

Now here's a pretty picture to remind us all that life is colourful and really quite good:
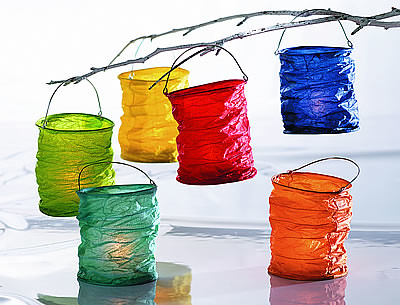

Colorful lanterns, originally uploaded by lelandadam.

Thursday, 22 April 2010

Art Journalling Dilemma

Recently I've started to notice something about my art journal. The sticky notes that put in to mark pages in progress have been growing almost exponentially - but I haven't finished One. Single. Page. since last December. I keep starting new pages, but I never seem to finish them! For a while I was fine with this, but now it's starting to bother me. I've realised there's a blockage. I love, love, love to lay down the paint and smoosh it around and create huge swathes of bright colours. And I really enjoy choosing out scraps of patterned paper and bits of foil to stick down all around the edge to create a border. I seem to have gotten over my composition hump without even noticing it. (yay!) These are some of my favourite pages. They're the ones that seem most 'me':

My first page using the collage around the edge composition-thingy. I also used some deco tape and some paper that I decorated myself. I was a little bit brave here and used a rub-on in the centre that I bought in a lucky dip pack from Ebay.

This page started off with just the large blue paper on the left side that I was planning to write a quote on. Then one night all the collage magically appeared! Then I tried to grunge it up a bit by sponging on the khaki green and using cut-out masking tape as a mask for the text. The technique is from The Complete Guide to Altered Imagery.

I stuck in the fashion magazine image ages ago just because I liked it. Some of the scraps I've used here are from Easter time chocolate wrappers. I cut them into circles with a craft knife and even stuck in the leftover bit. This is also my first time using tissue paper and I LOVE its transparent quality. The stencil in the middle turned out a little sloppy - I need to use my stipple brush every time! I like to go around them with a nice, thick gel pen. And yes, there's a big hole in the middle!

Recently I've noticed that I'm scared to do any more to these pages. There's definitely a process that seems right for each page: paint background, add collage, then add fine details (drawing, figurative painting, text, etc). Step One and now Step Two are working for me.
Step One: I've tried to get into the concept of layers, but it's just not 'me'. I hate covering up the work I've done before! When I see videos on YouTube like this one, (don't get me wrong, I do admire their work) I think ack! How can you cover up all the beautiful colours you just used! It's just not for me. So I've just been sticking to one layer of paint lately, and I feel much happier.
Step Two: I love, love, love collage! As you can see from my favourite pages above, I've really come to terms with it. A few weeks ago I went through all my papers and collected them together in one place. I also bought some folders to store and display them in. Just looking at them makes me excited.

As for Step 3: whenever it's time for the fine details, I baulk. I suppose I could declare them 'finished' at this point, but they don't feel finished to me. I feel I should add more to them, but I don't want to cover up the amazing paint colours that I've already laid down. I'm conflicted.
What can I do? I could do an ink drawing so that the colours still show through, but what of? And am I good enough at drawing yet? I could do a gel transfer of a black/transparent image, but what if I stuff it up? I could write out some text, but what should it be and will my handwriting be good enough?

Stupid Negative Nancy has come to visit again and she won't go home! Just when I was starting to get into a rhythm and enjoy the work I'm creating!

A word of warning - I'm not very good at finishing blog posts, either.

Sunday, 11 April 2010

My Mini Holiday

Last weekend Boy and I went away for Easter. It had its high points and its low points. I can't really say it was relaxing per se, but we did get to see and do a few interesting things.
Here is the view from the lounge/bedroom of the Bed & Breakfast we stayed at. Note the lack of civilisation. Just what I needed!


Here is a detail of an interesting sculpture I saw at the Arthur's Seat Hedge Maze. I love the wavy swirliness of it, like it's blowing in the wind. I found it kinda inspiring:


We did some drawing at the beach. Here is a drawing I did with my new brush pen:


I enjoyed the process of using different marks to stand for different features in the landscape. It didn't take me long to do that one, so I decided to do another one with watercolour pencils. The set I have has some very strange colours in it - 3 shades of orange but only 1 shade of green and no dark brown! But I got by. I didn't have any water to blend them with and I was going to do it when I got home, but I think I like it the way it is. I really liked doing the same scene with different media and found the different processes and results to be interesting.


I took along my rubber stamp making kit that I bought in Japan and made my first stamps with it! I used them to make a card to say thank you to our host when she helped us after my car broke down (that's why I said there were high points AND low points to our holiday!)


After the stress of my car breaking down and having to hire a car on the second day, I wasn't really in the mood to do any more arts and crafts. We did go for a lovely walk through the bush though. I love it when you emerge from the bush and realise you just spent the last hour and a half exercising and you didn't even notice it!

Thursday, 1 April 2010

A Trip to the Library, Part 2

The next book I borrowed was A Guide to Making Decorated Papers by Anne Chambers.


Sorry, this was the best picture of the cover I could find.

Published in 1989, it's quite an old book, but still contains much valuable information. The history in the introduction was short but interesting. Of the 9 techniques, the ones I found most inspiring were paste papers, orizomegami and suminogashi. Paste paper involves cooking up a flour and water paste and adding colouring. Then you spread a layer of paste on your target paper and mark it using various methods. Once dry, areas of light and dark shading are created. This technique was quite exciting, because it's so easy and, with almost endless variations available, you can make a paper that looks funky and modern, or baroque and intricate.


paste paper - raspbery & blue, originally uploaded by lubsy1uk.

Orizomegami involves taking rice paper or another absorbent paper, accordion-folding it, and then dipping the corners in dye. I have seen this technique before recently, but using paper towels and not acknowledging its Japanese origin. I was a bit iffy on it then, but Anne Chambers' explanation of the process and her use of a more substantial paper was a lot more interesting to me. The illustrations showed some beautiful results, reminiscent of stained-glass windows.

Suminogashi is a close cousin of the more well-known marbling technique that uses oil paints swirled on a turpentine bath. This technique however, uses writing ink and water, which is much less messy and toxic. The result is a light, delicate marbling effect with a lot less effort than you would have thought.

I will be trying all of these techniques in the near future. Another interesting section was on rubber stamping - a concept that's pretty straightforward, but Chambers demonstrated some shapes and configurations that I hadn't thought of before. Using rubber stamping in combination with the paste paper decoration seemed particularly intriguing. I'm definitely glad I borrowed this book!

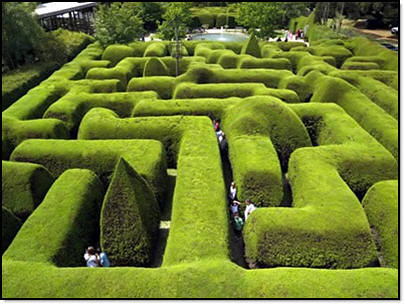
In other news, I'm going away on a mini-holiday for Easter! It's fast turning into a tradition that Boy and I go somewhere with lots of food and wine at Easter. Cos that's what it's all about, right? This year, it's the Mornington Peninsula:


ashcombe-maze, originally uploaded by thealexandertoddwilliams.

There's hedge mazes, too!

Sunday, 28 March 2010

Easter Baking

Sure, it's a little early for Easter, and sure, I don't really celebrate it anyway, but I wanted to bake something and I landed on Tsoureki - Greek Easter Bread.

I used this recipe. I just put all the ingredients in the bread maker and it was quite easy. Here they are:


The hard-boiled coloured eggs are supposed to be red, but the cochineal was on the blink (?!: it just didn't work) so Boy added some blue and that did the trick.
Well, the bread was delicious! It's sweet and soft with a citrus taste. The only thing I would do differently is add the boiled eggs after the rising stage - as you can see, the blue stained the dough as it was rising.
The recipe didn't give any indication as to what to do with the boiled eggs. Hmm! So Boy and I broke the bread open, pried the eggs out and ate them before eating the bread. It was like a two course meal!


I've just discovered Asemic Writing. Basically, it's a doodle or scribble that bears a resemblance to writing but doesn't 'say' anything. Here's a sample from Flickr:

Page from a book of asemic writing by Mirtha Dermisache, 1970.


Symbols from pre-literate cultures, children's symbolic drawings, languages invented by artists or writers, and manuscripts that cannot be read or de-ciphered all come under the umbrella of asemic writing. I'm fascinated by this. It could have some really interesting applications in my art journal.

Saturday, 27 March 2010

A Trip to the Library, Part 1

I think I'd like to talk about some art & craft books I borrowed from the library over the last few months. Firstly, I borrowed The Complete Guide to Altered Imagery by Karen Michel.


I'd heard quite a bit about this book from other journal artists, and I have to say, I was a bit disappointed. Perhaps it was just because most of the techniques didn't fire anything up in me. Maybe it was because some of the materials are quite hard to come by. Perhaps it was because I don't like the author's style of art - which is completely a personal thing and has nothing to do with the content of the book. I put it aside for a couple of weeks, and when I picked it up again, I started to see it in a different light. I started thinking about which techniques were more 'me', and how I could apply them to my art journal.

The first section deals with altering photographs. There is some amazing stuff to be done with rubbing, scratching, colouring and bleaching original photographs. Unfortunately they're a lot harder to come by than they used to be, especially since the Polaroid camera was discontinued. All of my photos these days are taken with a digital camera and then printed out with my mini photo printer (I love it! <3 ) However, Boy has informed me that techniques involving chemically altering the image emulsion are not going to work with photos printed in this way, which was a bit disappointing. The last part of this section has some interesting examples of how to incorporate the altered photographs into a collaged and painted artwork.

The second section looks at altering images digitally using photo-editing software. It has some interesting techniques, some of which I hadn't thought of before. It doesn't go into the nitty-gritty of how to use particular programmes - there are so many out there, it would just be impossible. There's some food for thought here, though.

The third section covers altering found images (from magazines, etc) and incorporating them into artworks. I've seen all of these techniques before in collage books dating back to the 1970s, but it's nice to see them presented in a new way - and in colour!

The fourth and last section is a gallery of pieces by artists working in the altered and/or mixed media genre. Some of these got me really excited. I started to think about which particular artists, both in this book and online, I like the most. And looking at their styles got me thinking about what my style might be when it eventually emerges. I haven't come to any firm conclusions yet, but there are certain techniques and juxtapositions of elements that I seem to be using more than others. I'll do some scans soon and show you what I mean. I know I've only just scratched the surface when it comes to using different materials and techniques, and I know I'm a long way off from being able to define my style, but I feel I'm inching closer and closer.

In other news, I've been writing away furiously at my new zine - and I've started a second one! Busy busy writing time.

Have a great weekend!

Friday, 19 March 2010

Manky, Skanky and Dangerous to Know

I've been struck down with an early-autumn flu and haven't felt like doing anything except lying weakly on the couch. For once I've been a sensible girl and taken all the medications that one's supposed to at time like these. It's been an interesting ride. I don't know what's in that stuff, but it's made me feel a bit giddy. I've been saying things like, "that department is a bloated cash cow, floating serenely through the sky sucking up money like the cream off the top of the taxpayer's crop". My workmates thought it was a little odd.
I've managed to make headway on my journal cover though. My first writing journal was a normal, ordinary, spiral-bound exercise book of the sort you get at bog-standard, boring office supply shops. Normal and boring! After months of scribbling away, it was still only half full. I was so sick of it. I need colour and variety! So recently I decided to rip out the rest of the pages and declare it full, even though that's cheating horribly. I decided to make a nice, crocheted cover for it though, to make it more appealing to flip through in future.

I was experimenting here: I put my finger over the flash
and then tweaked up the colour in Photo Studio.

It doesn't look like much now, but I'm imagining flowers and dangly things later on. Possibly.

The Wish Journal project is on hold right now, as I decided that I needed to order some pretty paper for the cover. And of course some other pretty papers as well from the same Etsy shop - it's better value if you buy more! Right? I hope they come soon!

P.S. I'm very excited because I've just become an official Textile Designer! According to Ravelry, anyway. You know how I have trouble reading knitting and crochet patterns so I tend to make up stuff myself? Well, apparently that's designing! The site admin asked me to create a profile and get things up to scratch so that people have access to my patterns. Erm, some of them aren't actually written yet. But I'll work hard to fix that up over the next couple of days. You have to have a Ravelry account to access my profile, but I'll post it here anyway.
Wow!