Monday, 28 December 2009

2009 In Review

This is the bit where I review my 2009 New Year's Resolutions and make some new ones for 2010. I almost couldn't find where I'd written down this year's Resolutions at first. Then I realised they were probably in my old art journal, the one I abandoned when I resolved to use quality products (see, I'm improving already). Here they are:


How did I go?:

2009 Resolutions / Goals
1. Keep a food & exercise diary.
I certainly did this very successfully. The diary encouraged me to eat somewhat better, and helped me to identify problems and improve my diet. Low-GI is your friend, I say! It especially helped me to keep on track with exercising regularly. Late last year I ditched my gym membership and had no way of tracking my progress - the diary provides motivation for me to exercise regularly and build on my achievements.

2. Save money & travel at the end of the year.
I achieved the goal of saving enough money to travel, but unfortunately circumstances prevented Boy and I from going out and doing it. This year was the Year of Weddings. (Not ours! ehehhe) Thanks to the Weddings though, we did have two lovely short holidays in Echuca and in Bright. We got to hang out with friends and had a fantastic time. Mountains and wine and cheese and beer, oh my!

3. Sell at a shop or a market at least once.
Er, this resolution fell over completely. I didn't even make enough craft items throughout the year to fill half a market stall. In 2008 I only sold one or two crafted items in my Etsy shop, so I made a half deliberate decision to make knitted/crocheted items just for myself/friends and not worry about selling them. I decided to concentrate on zines as they seemed to constitute the vast majority of sales online. As for a market stall, I'm pretty sure zines would not be a very saleable item. I only wrote one full-size zine this year anyway...
I knew this would be a challenging goal for me, and I wasn't very optimistic that I could achieve it. I had no idea just how badly I would fail to achieve it, though. In fact, going through my blog posts from a year ago, I can see how little of what I was starting at that time has come to fruition. My confidence was at rock-bottom for most of this year. I could write a much longer list of what I didn't do than of what I did do. I don't think that would be very productive however, so I'll refrain.

4. PROJECT: Write an appreciation letter once a week.
This was a project that I devised late last year. I wanted to write an illustrated single-page letter each week on the theme of gratitude for various different things in my life, and perhaps make them into a Blurb book at the end. I think I wrote about 5. I am not really good at long term projects. My interests tend to skip from one thing to another fairly quickly. Numerous times I've become interested in a craft, but by the time I've had the money/time/effort to purchase the materials, I'm already no longer interested in it. (Hence my series of 5-Minute Obsession posts!) I started to feel guilty that I wasn't writing a letter every week, that I was 'ruining' the project, etc. So to spare myself the guilt, I officially cancelled it. I'll glue the pages into my old art journal for safe-keeping.
Perhaps this 'project' was less about completing the project and more about learning what kind of art/craft project works for me. (i.e. short ones!)

5. PROJECT: Do a drawing once a week.
I sorta, kinda half completed this project. I probably drew on average about once a fortnight. I was better in the second half of the year when I started to get into my art journal again. I'm no Michelangelo, but if I feel my art journal requires, say, a naive interpretation of a chilli, I can put one in without worrying too much that I'm going to ruin the page. Realistic portraiture is still beyond me though!

6. Practice piano 1/2 hour per week.
I got bored with this one pretty quickly too. Then too much stuff started to accumulate on the floor in front of where the keyboard is set up in the hobby room. This resolution lasted about 3-4 weeks. Like I said, when I get bored with something, I don't bother persisting with it. I still like the idea of knowing how to play an instrument, though.

2009 Wrap Up
This year was a bit of a 'nothing' year for me. I didn't get much done. I spent a lot of time not feeling very good about myself, and a lot more time trying to figure out why. To use a computer analogy, I think creative people often go through phases of Input, Processing and Output. 2008 was a year of Input for me, 2009 was a year of Processing. Ideas have started to appear on the monitor of my creative life recently - hopefully in 2010 I'll figure out how the printer works and there will be Output!

2009 Statistics
Books read: 133
Items sold Etsy: 42
Items sold Artfire: 3
Opportunities: 5
Opportunities followed through: 1
Blog posts: 54
Craft items started: 10
Craft items finished: 6
Zines written: 2
Art journal pages completed: 15
5-Minute Obsessions: 12*
No. of 5-Minute Obsessions projects materials acquired: 9
No. of 5-Minute Obsessions projects started: 6
No. of 5-Minute Obsessions projects finished: 0
Longer than 5-Minute Obsessions: 6**
New techniques learned: 4***


* 5-Minute Obsessions: 1. embroidered fabric art cards; 2. making a drop spindle; 3. terrariums terraria; 4. rubber stamp carving; 5. Moleskine products; 6. bookbinding; 7. drawing what I wear; 8. calligraphy; 9. online Art Journalling course; 10. crocheted animals; 11. needlepoint/Jane Austen crafts; 12. making cushions.

** Longer than 5-Minute Obsessions: 1. writing; 2. Rhodia paper products; 3. fountain pens and nib pens; 4. downloadable stationery; 5. JetPens; 6. reading (lasted all year!).

** New techniques learned: 1. no-sew zippered crochet pouch (made up myself); 2. Sharpie ghosting; 3. gel medium transfers; 4. envelope enclosures.

Sunday, 27 December 2009

Kitty Gifts and A Few Quick Drawings

I spent the lead up to Christmas churning out cat toys for all my feline friends:

A three-pronged toy for a trio of troublemakers.

A Triumvirate of toys for a Totally Awesome Cat; and a some for a kitty who doesn't know who he/she is yet.

I did this drawing about a month ago when I was on holidays in Bright. It's the view from the balcony of the cabin that Boy and I were staying in:

Sakura Pigma Micron brush pen in Blue Book.

This is my first mandala, which I drew yesterday and coloured today:

Sharpie marker, watercolour in Blue Book.

It's turned out really well, I think. The watercolours are so much brighter when they're dry. I have decided I like mandalas - I can be creative, but I also like it when everything is symmetrical and in the 'right' spot. With mandalas I can have it both ways.

Enjoy your holidays if you got 'em!

Sunday, 20 December 2009

Full Circle

After a break of about a month, I've started to work on my art journal again, and I'm glad. I always have phases where I rush around and get all stressed and tell myself, "I don't have time for art or craft!" Which is silly, really, because it's my favourite and most relaxing thing to do. I guess it's easy to fall into that trap at this time of year, instead of enjoying the holiday season.

I made this page last night while I was watching Zulu on DVD - a slightly surreal combination of activities:


Art Journal Page: acrylic paint, watercolour, gel pen, fountain pen, felt pen, glitter glue, collaged wrapping paper, chocolate wrappers, paper scraps and vellum.

It's about Christmas and some things that I feel about it, and the work functions that I've been to and how it's much more fun when you don't stress out about it. In some ways, I could call this the "I Don't Care" page. I just mucked around without thinking much about composition, colour or anything else. And dammit, it was fun!

Note: I stuck the vellum down in spots that looked too 'empty' to me. I hate to see any blank spots on a page. I'm certainly not a minimalist - probably the opposite, whatever the word for that is. The words on the vellum are a reference to the many reports we have to scan at work. Often they will have a page(s) in the middle somewhere which has nothing on it except the words "This page has been left blank intentionally." I've always found that mystifying, and it sprang to mind when I saw the blank spots on my page.

P.S. The bright pink gel pen I used on this page is my new Sakura Jelly Roll from JetPens. It's one of my most favourite gel pens yet!

Tuesday, 15 December 2009

Trends in Craft #1 - Cupcakes!

Welcome to the first of a 10-part series on Trends in Craft. Since I joined Etsy two years ago, I've noticed there are certain themes and motifs in craft that are insanely popular. Some are cute, some quirky, and some are in fashion seemingly for no reason whatsoever. I thought I'd start with what is quite possibly the number one theme of the last couple of years - Cupcakes!


I've never made cupcakes myself, and I rarely eat them, but I really can see the appeal. They're small, rounded and colourful, and therefore cute. Their round shape and simple lines make them relatively easy to reproduce in knitted, crocheted or illustrated form. They can be decorated with an almost infinite variety of embellishments to suit the occasion: holly for Christmas, pastel colours for Easter, a candle for a birthday, etc. Plus, anything with icing on it is a good thing, in my books!

CREDITS:
TOP:
L: Cupcake Necklace by A Jewelry Boxx.
C: Christmas Snowflake Monogram Fondant Cupcake by TwoSugarBabies.
R: Confetti Cupcake Newborn Hat by NinisHandmades.

MIDDLE:
L: My Little Cupcake Collection by babychickdesigns.
C: Cupcake T-Shirt by KillTaupe.
R: Cupcake Girls Original Art Print by jennysbakeshop.

BOTTOM:
L: Mini Pink Frosted Dark Chocolate Plush Cupcake with Rose by cherylasmith.
C: KEEP CALM AND HAVE A CUPCAKE Print by jennysbakeshop.
R: Minty Chocolate Amigurumi Cupcake by anapaulaoli.

Saturday, 12 December 2009

Saturday Morning

I've spent all morning de-cluttering my laptop. According to Mike Nelson's Stop Clutter From Stealing Your Life, there is such a thing as computer clutter! I've organised all my craft patterns and stationery downloads into folders. Now, with only 4 clicks, I'm able to tell you that I have 7 different gift tag PDFs to choose from, so there's no need to buy any. I have 3 types of To Do Lists, but no Thank You cards. (What does that say about me??)

I was feeling pretty proud of myself! A few months ago, I cleared up my email and set it up to automatically sort different types of emails into folders. That was immensely helpful. Except for one little thing:


I really need to cut down on some of my email subscriptions!
Hope everyone is having a relatively stress-free pre-holiday time.

[Later:] I walked to the post office to pick up a parcel (I'm a complete advocate of online gift shopping!) and I happened to walk past the Wool Shop. It has 'traditional' opening hours and it's not normally open when I'm in that area. But it was today. I'm glad I travelled light, and I didn't have my credit card on me, or else it could have been a real disaster. I didn't go in, but as I glanced through the front door, I noticed a basket full of handmade hats and scarves with a sign on it saying "$15". Fifteen dollars?! I don't know much about selling through shops, but I imagine the maker would probably get $5 to $10 after the shop takes its cut. I'm more certain that each of the items in the basket would have taken at least 3 to 4 hours to make, minimum. That's practically sweat shop wages! I was a little outraged. I would not buy an item that I knew was handmade for that cheap. I have heard of sellers on Etsy having a lot more success after they increased their prices, and now I'm starting to understand why. If you want to feel good about buying something handmade, then you want to feel good about paying the maker a decent price for it, too.
Just my thought of the day.

Sunday, 6 December 2009

Back from Holidays


I'm back, and I'm too busy to wonder whether I have the post-holiday blues.
At least there's always craft!

Friday, 27 November 2009

Holidays!


Norway Holiday, originally uploaded by Lins~.

I'm going on holidays in the mountains!
Four nights of reading, writing, drawing crafting, brunching and spa-ing. Yay!

Wednesday, 25 November 2009

Changes, Part 2 (Electric Boogaloo!)

The next craft project on the chopping block is this:

Ripped! Gone! No Longer!

It's a cushion cover that I was making from the 200 Crocheted Blocks book. When I got the book, I loved it so much that I just wanted to make something ... anything ... from it. So I grabbed some random wool and started on a random block. At some point I decided to make 3 more and turn it into a cushion. Then when the weather got really hot, my brain was too fried for complicated patterns. I started to hate it because the yarn was ugly, the block didn't lie flat, and I'd have to sew a backing for it. So it fell by the wayside (literally: it ended up on the floor next to my bed).

Skip to quite some time later, and I was enthusing over the projects in 200 Knitted Blocks book. I wanted to make another project from it so badly, but Sensible Me knew that starting another blanket would just be silly. Not only do I have the Your Chequered Heart Baby Blanket to finish to a deadline, but I also have the Stitch Sampler Bedspread, the Circular Rug and the Lost Dogs' Home Blanket to finish. One of which I started 18 years ago!! (Not the Lost Dogs' Home Blanket, though my conscience twinges whenever I think about it. Yes, it's true. I have craft guilt.) So, no, another blanket is out of the question.

The book had samples for a couple of cushions as well as blankets, and that seemed like a capital idea. After all, I have 2 new couches that are just begging for a little adornment. And if I chose my design and yarn carefully, this could be a project I loved from start to finish. So on the weekend I sat down and designed some cushions:


I had a lot of fun with this - combining drawing, design and crafting. Well, crafting on paper, anyway. Years ago I read about young architects - very rarely do their designs ever get built, but they design anyway for practice and experience. They call it Paper Architecture. I guess what I was doing was Paper Knitting. I may make them one day. I may not. It doesn't really matter. I have to return the book to the library in a distressingly short period of time, so it's comforting to know that I have some-ready-to-go projects stashed away in my Blue Book. (That's just my drawing journal, but lately I've been thinking of it that way because it has a blue cover.)

As promised a while back, here's a photo of the doodle I drew in my Blue Book when the weather was too hot to do anything that required brain power:


It's my first attempt at a 'doodle' style drawing. I really like it. The only negative was that I coloured it in with watercolour pencils, and then it took FOR. EVER. to go over all the details with water and a brush, making sure they dried in between so they didn't bleed. It was a major pain and I gave up about half way through. Next time I think I'll use normal pencils. I added some mandala motifs in there. I want to try doing a full mandala next.


P.S. In an effort to make sure I blog regularly, I actually wrote this post before I even started doing anything about the Former Cushion Cover. I'm eager for blog-love! Really!

P.P.S. The photos today come from the Can't Be Arsed School of Photography.

P.P.P.S. I've started writing a new zine!

Sunday, 22 November 2009

Changes

Sorry about the lack of posts lately. I actually wrote this one up at the start of the week and forgotten that I hadn't actually posted it until today. Oooppps.

I mentioned a while back that I wanted to do a major overhaul of my craft projects. Finally, it has begun!

The one-third-finished Mohair Beret from the Cleckheaton book I won at the Knit-In-Public day two years ago?

Why on earth did I ever think I'd wear a beret??

The Heirloom Baby Blanket that I haven't worked on for a year and can't remember what row I'm up to?

What a giant pain in the butt!!

The half-finished Elizabeth Zimmerman Baby Tomten Jacket that I was once so enamoured with?

As if I'd ever finish that, with all those loose ends to weave in!!

That last one was the hardest. I was almost half-way through the knitting. (That picture only shows the beginning - I had actually knitted about 120 rows.) It's a shame to waste so much work. But then I looked at it again and realised it would be ridiculously too big for a newborn baby. That annoyed me. So..... RIP!

I turned the blanket into a jacket, and I turned the jacket into a blanket. That gave me a perverse sense of satisfaction.

I'm still making an Elizabeth Zimmerman Baby Tomten Jacket, but now it's in the Panda Baby Lustre that I was using to make the old blanket. I'm calling it the Snow Elf. I'm using 3.25mm needles instead of 4mm, so it should be much smaller and more suitable for my new niece/nephew.

The Snow Elf, in its infancy.

I still wanted to make a baby blanket, but a simpler, less annoying one. I happened to have a copy of Jan Eaton's 200 Knitted Blocks just lying around. I'd borrowed it from the library on a whim and it just happened to be the perfect book for what I wanted to do. Serendipity! The great thing about this book and its sister 200 Crocheted Blocks is that you're basically designing your own piece. Along with the 200 patterns (each of which is for a 15cm square), there is a section on combining textures, colours and shapes, and one on sewing them together and finishing them with various edgings. The sample blankets are amazing and quite drool-worthy, but the way they are presented - not as a finished blanket, but as a series of squares next to each other - reminds you that it's really your choice to combine the squares in any way and any colour you choose. It was very exciting! I chose Block No. 17 Checks and Block No. 83 Heart In Frame, and designed the Your Chequered Heart baby blanket.

The first block off the rank.

I will have to knit 36 squares, sew them all together and add an edging. It's a little daunting, but it's a hell of a lot less daunting than that white, lacy, double-stranded nightmare on circular needles and bristling with stitch markers that I was confronted with before. I actually do like the Henry's Baby Blanket pattern, but my head's just not in a place where I can cope with it. I'd like to give it a go one day, though.

Finally, the old beret is now this:

Fuzzy!

It's a skinny scarf that's *very* loosely based on one I saw on Etsy. The original is knitted, not crocheted, and it's made sideways, not lengthways, and it has even ends, not a stepped ends, and it's orange, not pink. So yeah, I can see the resemblance! I'm pretty happy with how mine turned out. The only disappointment is that it's way too hot to wear a mohair scarf now. But come winter, I'll be all scarfed up!

Friday, 6 November 2009

Two new techniques for the price of One!

Well, three new techniques when you think about it.

It's been all about my art journal the last couple of weeks. I've been getting all excited about it. Here's my latest page:

Wabisabi. Acrylic paint, gel medium, spreader medium, vellum, textas, ink pen.

I discovered Leslie Herger recently and her technique for backgrounds: Sharpie Ghosting. Basically you take advantage of the fact that alcohol-based inks will bleed through paint applied over the top to create ghostly-looking writing that can be used as a background. On the left-hand side, I used three different colours of Sharpie on top of each other, going in different directions, as in the tutorial. I copied down random phrases from a TV show I was watching at the time. On the right-hand side I already had a purple-coloured background, so I just laid down one layer of writing, using my pastel [brand]. On this side I copied a passage from a book on Zen Japanese Stone Gardens that I'm reading at the moment. I covered both sides with a layer of plain white gesso paint, and was amazed at how the coloured inks magically appeared as the paint was drying. (If this had happened accidentally, I imagine I would have been pretty pissed off, but as it was deliberate, I thought it looked cool.)

Having laid down this really cool background, I didn't want to cover it up with collage, and was hesitant to even do a drawing over it. So I thought I'd try a gel medium transfer. I'd heard about these ages ago, but was too scared to try them. Many of the instructions seemed to involve dunking your whole artwork in a vat of water, and there were horror stories about either the image or the base being totally ruined. But I was feeling brave! I found some good instructions by Paul Fujita here and a video here.

So - a gel medium transfer involves applying a gel medium to an image on a piece of paper, gluing it to your artwork and removing the backing paper, therefore transferring the image to your artwork. As the name implies! The image can be a photocopy, a printout from an ink jet printer, or a page from a magazine. The thing about transfers is that you don't have the hard edges that you get from a collage, and the background shows through any light areas. Making them unbelievably cool!

Wabisabi. Transfer on left page.

I did the one on the left first. It's sourced from a book I'd photocopied a few years ago when I was collecting pictures for a zine I was writing. I kept the spares just in case. Supposedly fresh photocopies work best, but I had no issues with this at all. Once the backing paper was all stuck down and completely dry, I then had to wet my finger slightly and rub at the paper until it came off in little pills. I had to rub and rub and rub! I tried using different tools - an eraser, scrunched up paper towel, a sponge - but they all took off sections of the gel medium (hence the big hole in the middle). So I went back to using my finger. I'm telling you, by the end of it, my fingertip was all red and sore! But I was so excited, I just kept going and going. My finger still hurts, but I regret nothing.

Once the transfer was done, I sanded it slightly as it felt very rough. Then I sponged a light layer of orangish-yellowish acrylic mixed with glaze medium over the whole double page, to unite both halves. The glaze brought out the ridges and brushmarks in the layer of paint below. I love this! In trying to decide what to do with the other half, I thought, screw it! I'll just put in another transfer! (By this time it was a few days later and my finger had had a little time to recover.) I chose an image from the same book I'm reading on Zen Japanese Stone Gardens. Wanting a subtle effect, I chose an image with a yellow background to match my background rather than a photo of greenery (it's a page from an Edo Period gardening manual); I scanned it and printed it. Then I glued it on down and went to work!


As I was working on this section, the concept of wabi-sabi kept coming to mind. There was a definition in the book, so once the transfer was finished, I wrote it in next to the transfer. I used rubber stamps to stamp the word across the top in a subtle lavender colour that echoes the purple background which peeks through at the edges on the right-hand side. (Which I'd first laid down a long time ago, before any of this was even thought of. Concepts of impermanence, change and time passing are starting to weave into this page, too. One thing I love about art journalling is that when I lay down the first background of a page, I'll usually have no idea what it will end up as, or even how long it will be before I go back and work on it again.)


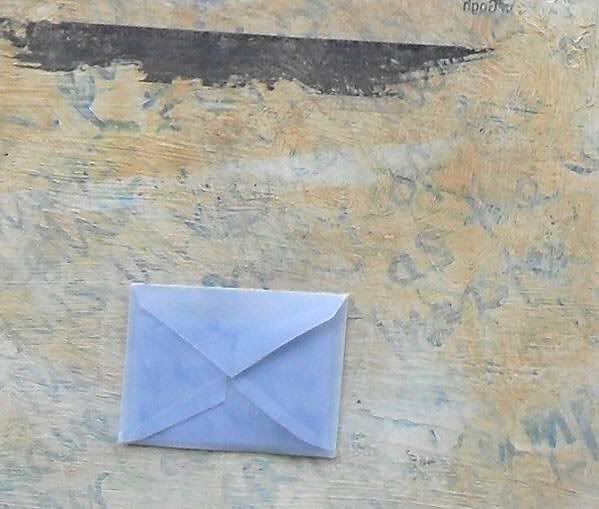
The final touch (and the third technique) is a tiny envelope made of blue vellum with a little note inside. I bought some packets of different coloured vellum from ebay last week. I didn't realise it would be so stiff and thought it would be more transparent, like the envelopes that postage stamps are kept in. Oh well, I thought I'd use it anyway. I made the envelope from a template I found online and printed it out way too small. But I kind of like it that way. The note just records that the image is a painting is by Vincent van Gogh and the date; I couldn't really think of anything interesting to write. In the future though, I'd like to use envelopes to hold pieces of ephemera and 'secret' notes to make my journal more interesting to flip through once it's finished.

I'm glad I finished the page on Saturday, because the last few days have been so hot that I haven't felt like doing anything. Normally I try to be philosophical about the heat, but I've had bad hayfever too, and that's a recipe that just adds up to grumpiness! Last night I started doing an easy doodle to keep my mind off how I'm feeling. I'll show you that once it's finished.

Keep cool, everybody!


P.S. Thanks for bearing with me, with these long, detailed and probably very boring descriptions of my art journalling. I'm mainly using them as a record for myself of what I've done, as well as a writing exercise to keep my brain busy.

Sunday, 1 November 2009

Recent Art Journal Pages

I started this page ages ago by impulsively scribbling down the Shakespeare quote. A long time later, I used gel medium to glue down torn strips of a photocopied page of a story I'd written. I still had no idea what to do with it. Much later again, I decided to try out my new acrylic spreader medium on it. When mixed with acrylic paints, it turns the medium into a transparent glaze. I used it with navy blue and a little silver, and sponged it liberally all over. Then I went over the quote a few more times with greylead and purple pencil to make it stand out a little more (but not too much - I wanted it to have a shabby, mundane look). I was tempted to add more elements, but I decided to leave it there, with a slightly minimalist (for me) look. The gel medium I'd added previously and slopped about without really thinking about it created an unexpected batik effect when I added the thinned navy paint over the top.
The page went from one I felt very ambivalent about to one that I really quite like.

What A Piece of Work. Photocopied text collage, gel medium, pencil, acrylic paint in spreader medium.

This page really has two different topics, but I bound them together visually using my new aqua blue acrylic paint. I don't really like the composition of the collage - that's something I feel I need to work on. I do like the drawing and juxtaposition of the heart element with the writing. This is when I started to realise that it would be fun to collect receipts and other scraps that I would otherwise have thrown away, and use them as mementos of a particular occasion.

I Want A Holiday / Visit from Mum. Magazine image, wrapping paper and ephemera collage, acrylic paint, metallic rub, pen.

As you can see, I'd been using this page to practice calligraphy. I didn't want to waste the rest of the page though, so I used the striped paper scrap to separate it from the rest of the page. I'd started out laying down light blue paint vertically; I added the dark blue oil pastel horizontally to suggest the ocean. The sails are a nod to the Sydney bay paintings of Brett Whiteley - I wanted to convey a sense of space, sunlight and heat. (I've obviously been yearning for the Spring that the local weather hasn't yet been providing this year.) I added green glitter glue to suggest the ocean swells sparkling in the sunlight.
I don't normally use quotes in my journal, but I added a few lines from a song that's been stuck in my head a lot lately.

Into The Blue Sea. Paper and ephemera collage, acrylic paint, oil pastel, felt-tip pen, glitter glue.

Here is a shot of the outside of my journal. I've only used about 10 pages, but it's starting to look obese already. That's inevitable when you're adding thick paint and glued-in papers to nearly every page. I've starting thinking about cutting out some of the central pages to even it out a bit.

On The Edge.

I did this page earlier today. It's in a new journal that I've started which is for when I want to concentrate on practising drawing with little to no paint, or I want to document something in my life, like the meal that I cooked on Thursday night:

Dirty Rice. Pen, watercolour.

Saturday, 17 October 2009

Fashion Obsessions #1

Statement necklaces are so 2009! (The first three-quarters of 2009, that is). I'm completely obsessed with scarves now! I hit up Ebay big time the other day (shhh, don't tell Boy!) and I can't wait for them to arrive. Meanwhile, here are some that look nothing like the ones I ordered:


As for what I'm doing craft-wise, just refer to my last post! I'm still working on the same projects as you see there. I haven't done any art or writing because, frankly, I can't be arsed.

Have a good weekend!

Friday, 9 October 2009

Works In Progress!

Work In Progress No. 1:


Remember a few weeks ago I reviewed Jane Austen's Sewing Box and I mentioned that I was enthused by the needlepoint project? Well, soon after I rushed out and bought a needlework canvas and some crewel wool and got to work. I went to Morris and Sons, the (relatively) new knitting and needlework shop in the city. I was pretty impressed with the place. I'd never seen actual Noro yarn in the flesh before, only in photos on the cool kids' blogs. I immediately rushed up and fondled it a bit. I chose a small needlepoint canvas from the huge range, and two staff members helped me choose some coloured yarns for it. Morris and Sons certainly isn't a place you visit in a hurry. It's also a little more expensive than other craft shops. Or maybe it just seems that way because they only stock quality merchandise. But the service is excellent, and I'll be going back.

Work In Progress No. 2:


Mystery project!

Work In Progress No. 3:


I started this just today. It's a pouch. Instead of crocheting it and then sewing the zip on (I hate sewing), I'm going to try using the zip as the base and making it from the top down. I have no idea if it'll work. It would be great if I could finish it!

Saturday, 3 October 2009

Crochet Darlings


Just when I thought the wool urge had passed me by completely this winter, I'm suddenly struck with a need to make knitted throws and cosies for everything I own. I haven't actually started yet, though. I have an equally strong urge to play computer games until way after my bedtime as well. Perhaps I could consolidate my obsessions by making a laptop cosy?

Thursday, 24 September 2009

My Outing

Last night I went to the opening of a photography exhibition at the Public Record Office of Victoria: Strike A Pose .. with Lee Lin Chin. Firstly, I didn't know that the Public Records Office had an exhibition space. Secondly, I got lost trying to find the place because the street directory lied to me and my GPS decided that North Melbourne didn't exist. Once I finally arrived though, I was glad I'd made the effort.

Image from Public Records Office of Victoria Website

The exhibition focuses on Australian fashion in the 1960s and 1970s, with a mixture of professional fashion shots and casual snaps taken of people on the street. I liked that, as it gives you a good idea of the contrast between what fashion was 'meant to be', and what people really did with it. The exhibition space isn't huge, and the photographs were a little crowded on the walls, but at least there was a decent amount of material in the exhibit. One of my favourite photographs was taken at the Sydney Spring Racing Festival, 1967: a Japanese model proudly wearing new-fashioned culottes, knee-high boots and a large floppy hat is surrounded by ladies still wearing Jaqcui Kennedy-style straight skirts and pillbox hats, all looking at her with amazement and disgust. I did notice that the material is a little biased towards Woolmark, who are the exhibition's main sponsor and presumably the main source of the material. Apparently it was de rigeur in the late 1960s to do fashion shoots in the outback - I felt sorry for the models posing in heavy wool coats in the desert. The paper mannequins with quotes from Vivienne Westwood et al in the centre added a nice touch of 3-dimensionality which kept the space from being stale.

Unfortunately, I didn't get to see Lee Lin herself (she's just so classy, she's well, a doyenne!), who the flyer assured me would be opening the exhibition. I was either too late or too early, I couldn't quite figure that out. A number of the plaques accompanying the photographs had comments from her on them though, so I almost felt like she was there!

I definitely think it's worth checking out (although I may be a little biased - the free wine and rice paper rolls helped!). I noticed a cafe and some couches in the foyer, so the directionally challenged like me have somewhere to recover before making the trek back to the tram. I snaffled some cool brochures and postcards on the way out. It looks like they have lots of interesting exhibitions, and I'll probably be back - now I know where it is!

Sunday, 20 September 2009

Art Journal Stimulus Project - Week 2

I'm 4 weeks behind, but I wanted to finish it anyway.
I decided to work over a page that I'd started about a month ago, but I wasn't happy with:


So then I turned it into this:


The task was to start with someone or something negative in your life that's holding you back. Then cover it right up with things in your life that are positive, encouraging, fun and/or playful. For an explanation of what materials and techniques I used, I've gone into the boring details in my Flickr, here. (There is a reason why there's a large drawing of my own head in it, I'm not just vain. But then again, it's a pretty big head on the page there...)

Here's a detail of it:


Here's something else I've been working on, in my new drawing journal. It's called A Week of Experimentation. I tried wearing different looks every day for a week. Some are quite daring - for me! The first day was more like returning to an old look, to ease myself into it:


I felt really cute! I will post the rest as photo opportunities allow. Or I might see if scanning them works.
Have a great week!
Be the craft!

Monday, 14 September 2009

Book Review: Jane Austen's Sewing Box


Jane Austen's Sewing Box explores the Regency Period crafts mentioned in the novels of Jane Austen. Craft work was integral to women's lives at the time, and so is referred to frequently in all of her writing. A knowledgeable yet entertaining introduction explains the perception of women and their role in society of the time. The sewing of clothes and manchester for themselves, male relatives and impoverished neighbours was known as 'women's work', and every respectable woman was to be seen with a work basket prominently placed in the home. 'Fancy work', as decorative embroidery was then known, was an acceptable activity to perform in front of guests, and allowed a woman to show off her skill and wealth - having the leisure time to work on unnecessary items was a sign of status in society. There is also a section on materials used at the time and how they were made, which is indispensable for anyone wishing to make truly authentic period pieces.

There are 18 projects, covering sewing, knitting, netting, glass painting, and papercraft, all of which are based on actual craft projects or handmade items mentioned in Jane Austen's novels. An introduction to each one, with quotes from Austen's writing, explains the item's context in womens' daily life. The projects are rated Beginner, Intermediate and Advanced, and those that contain mixed crafts (e.g. sewing and embroidery) are specified. Some projects, such as the Cravat or Muff, are not very practical and would appeal more to an enthusiast of the period. Others, like the Embroidered Work Bag or the Huswife (a pouch for keeping sewing tools in) would be very handy even today.

The first thing that struck me about this book was how beautifully designed it was. Period wallpaper and fabric designs border every page. The liberal full-page close-up photographs of furniture details and luscious coloured fashion plates could be construed as filler, but to me it had the effect of immersing me in the aesthetic of the time.


The second thing that struck me was the vagueness of the instructions. They're accompanied by hand-drawn diagrams, but not every step is illustrated. There are very few templates; instead we are told to cut a rectangle with an oval at the top 10cm high, for example. Personally, if I had to hand-draw that myself, it would look rather wonky. Some of the embroidery patterns require enlarging on a photocopier, whereas they would have easily fitted into the book at life size. To me, this detracts from the authentic historical feel of the creative process.

Despite the fact that some projects are labelled Beginner, I would not feel confident at all following the instructions if I had never tried that craft before. I have never done netting for example, and even though there are diagrams, I found myself at a loss. Perhaps it's a case where it would all fit together once I started, but I don't like working that way. By and large, the finished projects are photographed with either artistic blurring or from an odd angle or both, which make them of no use for the struggling crafter needing a visual reference. There are also a few errors - in Paper Flowers, for example, the materials list includes ribbon, which is not actually used in the construction.


Regardless of these flaws, I found Jane Austen's Sewing Box a delight. The mixture of history lesson and literature appreciation is highly readable, and I'm very enthusiastic about trying some of the projects, even if they do need a bit of nutting out. The Carpetwork Cushion (aka Tapestry work or Needlepoint) caught my eye in particular, and I think I need about 10 Huswives. I have a sudden urge for everything in my life to be floral.

I wonder what Boy thinks of that?

Wednesday, 2 September 2009

Hello!

Hello! I thought I'd just pop in and say hi. It's been a while. I've been pretty sick and feeling manky and not in the mood to do anything at all. I'm back at work now, but I still don't have the energy left over at the end of the day yet for making stuff. But.... I'm writing a crafty book review for your delectation, which I'll post in the next couple of days.

Happy making stuff!

Tuesday, 18 August 2009

The Art Journal Stimulus Project begins!

The Art Journal Stimulus Project has begun! Here is my first page.

In a nutshell, the task was to write down negative feelings, then cover them up with layers of paint, and collage images, words and symbols that have a positive association for you.
I like the colours and the drawings, but I hate the composition. Collage has never really been my thing. I think the double-page spread was too large as well. I had an urge to fill it up with 'stuff' - quantity over quality.


I did most of this page when I was very sick. The part I enjoyed the most was layering the paints for the background. It was easy and I liked working with pure colour and mixing the paints. It also felt good to cover up the boring, whining text I'd written underneath!

I got most of the collage elements from a charity lottery brochure. I glued them all down with gel medium - it's the first time I've used it in this way, and I really like how it seals the papers and gives them a slight gloss. I don't like how the collage turned out (the composition) though - I don't think I'm very good at collage (yet?).

Next I got out all of my markers and experimented with which ones would work best on this surface. That's helped me a lot already. I also drew some things that make me happy, e.g. my ipod.

One thing I have trouble with is writing on my journals (I have a separate writing journal so I have an instinct to keep them separate), but then I remembered this is an Art "Journal", so I drew a picture of an event that made me happy recently (i.e. having a pie lunch with friends). I know there isn't much actual writing, but it's a start!

To finish, I sponged some light green acrylic mixed with gel medium over all of the pictures and some of the words. That improved the look of it a lot, as if it bound it all together.


Just a few problems I had with it -

* some of the pens needed a long time to dry, and they even smudged a little when dry when I added gel medium on top. But I got around that by being careful.

* the pages curled a little (you can see that better in the detail photo) but not too bad.

* the finished page is now quite tacky from all the gel medium, and the pages stick together when I shut the journal. I am going to insert a piece of waxed paper, and hopefully that will solve the problem.


Detail of the left hand side of the page. The blue piece on the left is my first attempt at making a decorated paper. I used rubber stamps, dotted acrylic paint and a watercolour wash on a security envelope. I didn't like the composition of it at all, so I cut it into strips.

Includes some 'swirlies', which I always tend to end up doing when I'm doodling.

Tuesday, 11 August 2009

Etsy Purchases

Here are some things I bought recently on Etsy:


First, we have some zines and a handmade journal from Sparkle Blue Faery. I'm so glad she's started posting her art journal entries in her blog. I love her work - it's nature-based and has an authentic feel. She added in some extra zines and art materials as I was a repeat buyer. I was so thrilled when I opened the parcel! I'm torn between racing through the zines and reading them slowly to make them last longer.

The second photo shows some zines and a bookbinding kit from Craft Leftovers. Kristen puts out a zine and kit every month, but these are the first I've purchased. Her zines have a how-to theme, with a different craft featured each month. The zine-and-kit combos sell out pretty quickly, but back issues of zine only can be bought any time. I'm still deciding if I want any of the back issues. And, er, yes, that is an accidental but very lovingly-applied wine stain on the cover of the top one.

I've been home sick the last two days, and, throbbing head and burning throat aside, I've really enjoyed reading and pottering around and reading and a little writing, which I'm sure hasn't made any sense. If this post doesn't make any sense either, then I apologise.

Sunday, 9 August 2009

Writing is Boring .. To Watch, Anyway.

A lot of my spare time lately has been taken up with writing - writing exercises and experiments, writing lists of things to do, writing in my art journal, writing emails to friends for their or my succour, signing up for an online writing course that I haven't had time to start yet, trying to finish a book about writing that's due back at the library soon, reading about writing, talking about writing, thinking about writing ... and even selling my writing! Unfortunately, all that activity doesn't tend to add up to blog posts with pretty images, and unless I'm willing to post what I've written, not much content either. So, I'll show you what isn't too boring or too personal, and what I've been able to take half-decent photos of, and if I fill in the gaps with images of things that I like from Etsy or Flickr, I hope you forgive me. Besides, it's my blog and I'll post whatever I want!

Today I'd like to share some of the new and inspiring blogs I've started reading recently, in:

EIGHT GREAT BLOGS I JUST FOUND

1. Fawa - I love her cutesy-kitsch yet slightly creepy illustrations, and I just ordered some hand-carved rubber stamps from her Etsy shop. Her little monster pouches are adorable too. I love the way she works in different media, a bit like me. The fact that she's in Mexico got me excited too.

2. Sara Wears Clothes - [No longer available as of Jan 2010] - This new fashion blog is one of those a-post-a-day, this-is-what-I-wore-today blogs. But unlike any other I've seen, this girl has a dress size in the double-figures, and actual cleavage. So empowering!

3.Go Fug Yourself - Another fashion blog, this is one of my few celebrity-watching indulgences. A plethora of fugly outfits with laugh-out-loud commentary.

4.The Argyle Academy - by Mike Lowery. His illustrations are cute and whimsical and everyday and magical and witty. And he's just gotten back from Japan.

5. ii-ne-kore and jollygoo - Two blogs dedicated to Japanese design, aesthetics and food. One is by an ex-pat Japanese girl living in Melbourne. Both of them regularly make my mouth go 'O'. I couldn't stop at just one!

6. Spiritual Evolution of the Bean - Biffy Beans is a former heavy-metal fan who's obsessed with ink, pens and paper and uses them to make beautiful mandalas. She's on my reader because: a) she's even more obsessed with art supplies than I am, and b) she demonstrates what amazing art can be made from the most simple materials.

7. Capybara Madness - I've recently branched out from reading craft blogs only, and I think I'm the better for it. This one about (and by?) Caplin Rous, a pet capybara living in the U. S. but who has his little paw on the world-wide capybara pulse.

8. A Lovely Dream - by Suzi Blu. A mixed media artist who does tutorial videos on art, journalling and all round just loving yourself. Her dog Gigi is adorable. I think I have a bit of a lady crush on her. And I'm OK with that.

Tuesday, 4 August 2009

Sunday, 2 August 2009

Mini Zine Fun


As promised, here are some pics of the mini zine I made, which I am giving away free with every order until the end of August. My aim is to eventually write a trilogy, and make a snazzy envelope type deal to present them in. One day soon.

Meanwhile, I just finished reading this book which arrived in my mailbox the other day:

The Decorated Journal, by Gwen Deihn.

It tackles art journalling from a technical as well as an inspirational point of view. A wide range of materials and techniques are covered. There are many styles and themes of journal, many of which I hadn't thought of before. It's an amazingly helpful book, and I'm really glad I bought it. I'm sure I'll look at it again and again.
I've also been doing some writing, mostly exercises, and trying to get my head around the insanely large number of craft projects I have, and how to reduce them and sort them out.

August is Sort It Out Month!

Thursday, 30 July 2009

Luscious Things for Sale!


New Mexico Harvest, originally uploaded by nicholsphotos.

We interrupt this blog to give you the following public service announcement:

I have reduced the prices on all of my larger zines to celebrate the fact that I have a printer now and I don't have to pay for them to be photocopied. I am also giving away a free copy of my new mini zine Dreams with every order until the end of August. (Photos next time.)

I've having a bit of trouble taking photos the last few months. I leave the house in the dark to get to work, and the light's too bad to take any photos when I get home. So I can pretty much only take photos on the weekend - if the sun is out! I'm looking into making a light box, but my place is full to the gills with stuff already!

I hope the rest of your week is a rapid but smooth slide into a relaxing bath of weekendy goodness.

Saturday, 25 July 2009

A Day's Work

I had the day to myself this fine, freezing cold winter Saturday. So I made up a long list of Things To Do so I wouldn't get too cold or bored. I tried to make sure the housework was interspersed evenly amongst the fun crafty things, so I could hopefully trick myself into doing it without too much pain.

One of the things I did was finish the Creativity page in my art journal. (Though I guess they're all creativity pages, aren't they?) I started it the other night using the journalling prompt from Suzi Blu's YouTube video on layering. I just found out about her, and she's great inspiration. So, for this page. First, you write down all of the reasons why you can't or won't do art journalling. Then you cover it up with paint. I had to put a few layers on before it was all covered up, but it felt good. It ended up being a slightly different colour to what I'd planned in the start, but I liked the reds and yellows - they made me think of the fire and passion of creativity. I used my fingers to dab paint onto the edges. Then I set it out to dry.

Art Journal 18-JUL-09, unfinished.

Today, I got it out again to finish it off. You're supposed to stick a photo of yourself as a child on it, but I don't have any. So on the right-hand side I made a base with white paint that I could draw on, and used up the leftover paint on the left side, where I tried to make more of a raised, textured effect. When that was dry, I drew a polaroid-type frame with a Sharpie, and drew a picture of myself in it. I don't really remember what I looked like as a child, but I did have very long, thick hair which people always commented on, so I drew that. Actually, I don't think the face looks really like either an adult or a child - it has an ambiguous quality to it. But somehow that's appropriate - I'm not really an adult now, and I wasn't really a child then.
I couldn't remember what I was supposed to do next from the video, but then I thought, perhaps that's not such a bad thing. I'll let my instincts guide me instead. So I wrote across the top: "Perhaps from a creative point of view it's better if I don't remember exactly how to do it". I had been thinking of putting some blue on for contrast, so I mixed together some sky blue, white and silver paint, and I rubbed it on with my fingers. The finished effect on the left makes me think of steam - as if the creative fire is dissipating all the frozen misgivings and fears. I don't even remember now what I wrote underneath there! Perhaps that's the point.

To finish it off, I mixed the leftover blue/silver paint with some purple, and used it with a squiggly rubber stamp I got from Riot Art N Craft a few weeks ago. I love how it looks! It came in a pack of 6 with different textures. They are Teacher's Choice brand. I highly recommend going into the children's or school supplies section of any art or craft shop you find yourself in. You can pick up some really great stuff.
Here is the finished page:

Art Journal 18th - 25th July '09, finished.

Part of me wants to add more to this page. But then again, another part of me wanted to stop after the first, yellow layer of paint. I hate covering up stuff I've done before. It's so hard to decide when to stop. You just have to draw a line and trust that it's in the right spot.

In other news, I bought this last week:


It's my first (and probably not last) purchase from Notemaker. Here you see a mini Moleskine notebook (my first Moleskine, yay!), the Rhodia Essentials Box (also a very reputable maker of paper goods - and see how the box the notepads came in looks like a notepad itself!), and for special I also got some O-Check rubber stamps and stickers (a similarly reputable stationery brand from Korea). I have to say, I was very impressed with Notemaker. I had been unable to find the things I'd wanted in any of the bricks-and-mortar shops that I'd had time to go to. This site had them all. Some of the things my heart desired were on sale. And they had free postage over $60 so I added a couple more. Within 2 hours of ordering, I received an email saying my order had been shipped! And I received it the next day! And my things came in the lovely free drawstring bag you see in the picture. It's perfect for keeping my rubber stamp collection in. I was really thrilled with this purchase.

I think I'm becoming a bit of a pen and paper snob. I never anticipated it, but it's true. In Japan I saw a little of their aesthetic for beauty and quality in everyday things. I'm starting to realise that money well-spent on quality household items can be life-enriching. Gosh, I love to sit down and write with my Platinum Preppy fountain pen! So much so that I wrote this whole blog post out on paper with it before typing it up. And if you don't have the money to buy nice things, then making them yourself is just as special. Even more special, in my opinion. (Which is what I've been saying ever since I started this blog!) Hence the desire to learn how to bind my own journals. One day soon Ill get around to it, I hope!

Meanwhile, this is what I'm doing with my mini Moleskine:

The first page.

Amy being curious about the sticker page.